파워뱅크 고장 증상 해결 및 관리 팁 자가 해결 및 관리 가이드 (2026)

파워뱅크 고장 증상 해결 및 관리 팁 파워뱅크는 모바일 기기를 외부에서 충전할 수 있는 유용한 장치입니다. 하지만 사용 중 고장이 발생할 수 있으며, 이를 해결하기 위한 방법과 관리 팁을 알아보겠습니다. 1. 문제 원인 및 증상 요약 파워뱅크의 고장 증상은 다양합니다. 다음은 일반적인 증상과 그 원인입니다. 충전 불량: 파워뱅크가 충전되지 않거나, 충전이 매우 느림. 원인: 케이블 불량, 포트 손상, 배터리 노후화. 전원 공급 불량: 연결된 기기가 충전되지 않음. 원인: 파워뱅크의 출력 포트 손상, 내부 회로 문제. 과열: 사용 중 파워뱅크가 과열됨. 원인: 과도한 사용, 내부 부품 고장, 외부 온도 영향. LED 표시등 오류: 충전 상태를 나타내는 LED가 비정상적으로 깜빡임. 원인: 내부 회로 문제, 소프트웨어 오류. ...

2026년 11월 16일

How to Fix & Optimize Portable Power Station (2026 Practical Guide)

Portable Power Station Troubleshooting and Optimization Guide Quick Summary Portable power stations are essential for providing power on the go, whether for camping, emergency backup, or outdoor activities. This guide will help you troubleshoot common issues and optimize the performance of your portable power station in 2026. Step-by-Step Actionable Walkthrough Step 1: Check the Power Source Ensure the Power Station is Charged: Verify that your portable power station is fully charged. Connect it to a wall outlet or solar panel and check the LED indicators. Inspect the Charging Cable: Examine the charging cable for any visible damage. If damaged, replace it with a compatible cable. Step 2: Verify Output Compatibility Check Device Voltage Requirements: Ensure that the devices you are trying to power are compatible with the output voltage of the power station. Most portable power stations have multiple output options (AC, DC, USB). Use the Correct Ports: Connect devices to the appropriate ports. For example, use the AC outlet for appliances and USB ports for smaller devices. Step 3: Monitor Load Capacity Calculate Total Load: Add up the wattage of all devices connected to the power station. Ensure the total does not exceed the power station’s rated output. Disconnect Non-Essential Devices: If the load exceeds capacity, disconnect non-essential devices to prevent overload. Step 4: Inspect for Faults Check for Overheating: If the power station feels excessively hot, disconnect all devices and allow it to cool down. Overheating can lead to automatic shutdowns. Listen for Unusual Noises: If you hear strange sounds (buzzing, clicking), it may indicate a fault. Disconnect all devices and perform a reset if applicable. Step 5: Perform a Reset Reset the Power Station: If issues persist, consult the user manual for instructions on how to reset the device. This often involves pressing a specific button or combination of buttons. Step 6: Update Firmware (if applicable) Check for Firmware Updates: Some portable power stations have firmware that can be updated. Visit the manufacturer’s website to see if updates are available and follow their instructions for updating. Step 7: Contact Support Manufacturer Support: If troubleshooting does not resolve the issue, contact the manufacturer’s customer support for further assistance or warranty claims. Alternative Tips Regular Maintenance: Clean the power station regularly to prevent dust buildup, which can affect performance. Use a soft cloth and avoid abrasive materials. Store Properly: When not in use, store the power station in a cool, dry place. Avoid extreme temperatures, as they can degrade battery performance. Use Solar Panels: For extended outdoor use, consider pairing your power station with solar panels for sustainable charging. Monitor Battery Health: Keep an eye on battery health indicators. If the battery capacity diminishes significantly, consider replacing the battery if possible. By following these steps, you can ensure that your portable power station operates efficiently and reliably in 2026. ...

2026년 11월 16일

[광고] 2026 가성비 자동급식기 추천 Top 5 비교 및 실사용 가이드

이 포스팅은 쿠팡 파트너스 활동의 일환으로, 이에 따른 일정액의 수수료를 제공받습니다. 당신의 반려동물, 언제 어디서나 잘 먹고 있는지 궁금하다면? 2026년, 많은 반려인들이 반려동물에게 더 나은 돌봄 환경을 제공하고자 자동급식기에 관심을 기울이고 있습니다. 하지만 다양한 제품들 중에서 어떤 것이 적합한지 선택하는 것이 쉽지 않은데요. 이번 글에서 각 자동급식기의 특징을 비교 분석하여 어떤 제품이 여러분의 요구에 가장 부합하는지 알아보겠습니다. 1. 페블펫 반려동물 듀얼 스마트 카메라 Wi-fi 자동 급식기 V56 소재 및 내구성: 고급 플라스틱으로 제작되어 내구성이 좋고 외관이 세련되어 인테리어와 잘 어울림. 연결성: Wi-Fi 연결이 가능하여 스마트폰으로 언제 어디서나 급식 모니터링 가능. 가성비: 고급 기능이 많지만, 가격이 다소 비쌈. 정기적인 급식 관리가 필요하거나 자주 외출하는 반려인에게 적합. 2. HULULU 대용량 타이머 설정 건식사료 전용 강아지 고양이 반려동물 자동 급식기 소재 및 내구성: 내열성과 내구성이 뛰어난 고품질 플라스틱 사용. 연결성: 기본적인 타이머 기능만 제공됨. 별도의 스마트 기능은 없음. 가성비: 대용량(6L)으로 넉넉한 사료 저장 가능, 가격도 합리적이어서 가성비를 중시하는 분들에게 추천. 3. 디토펫 반려동물 자동급식기 4L 소재 및 내구성: 내구성이 뛰어난 BPA-free 안전 소재 사용. 연결성: 기본적인 설정으로 직관적인 사용이 가능하나, Wi-Fi 기능은 없음. 가성비: 반려동물의 건강한 급식을 위한 정기적인 시간 설정 가능, 가격이 저렴하여 입문자에게 적합. 4. 디클펫 반려동물 자동급식기 AT-310 소재 및 내구성: 고급 플라스틱 소재로 내구성이 만족스러운 편. 연결성: 타이머 기능과 수동 투입 기능을 제공. Wi-Fi 연결이 아쉬움. 가성비: 기능에 비해 가격이 적당하여 중간급 사용자를 위한 선택지로 적합. 5. 디클펫 반려동물 자동급식기 AT-210 소재 및 내구성: 단순하고 튼튼한 디자인으로 일상적인 사용에 무리 없음. 연결성: 타이머 기능만 지원, 정기적인 급식 설정이 가능. 가성비: 가격이 저렴하여 처음 급식기를 구매하는 분들에게 추천. 결론 사무용: 반려동물의 급식 모니터링이 필요한 분은 페블펫 V56 추천. 가성비: 합리적인 가격을 원한다면 HULULU가 최적. 입문자용: 간단하고 저렴한 제품을 원한다면 디토펫 4L가 좋은 선택이 될 것입니다. 🛒 최저가 및 상세 정보 확인하기 1. 페블펫 반려동물 듀얼 스마트 카메라 Wi-fi 자동 급식기 V56, 1개, 아이보리 👉 Coupang에서 현재 가격 확인하기 ...

2026년 11월 15일

기계식키보드 고장 증상 해결 및 관리 팁 자가 해결 및 관리 가이드 (2026)

기계식 키보드 고장 증상 해결 및 관리 팁 기계식 키보드는 뛰어난 타건감과 내구성으로 많은 사용자에게 사랑받고 있습니다. 그러나 사용 중 고장 증상이 발생할 수 있으며, 이를 적절히 해결하고 관리하는 방법을 알아보겠습니다. 1. 문제 원인 및 증상 요약 기계식 키보드의 고장 증상은 여러 가지가 있으며, 주로 다음과 같은 원인으로 발생합니다: 키 입력 불량: 특정 키가 입력되지 않거나 반응이 느림. 키 스위치 고장: 키를 눌러도 반응이 없거나, 눌림 상태가 지속됨. 연결 문제: USB 포트 불량 또는 케이블 손상으로 인한 연결 불안정. 청소 부족: 먼지나 이물질로 인해 키가 제대로 작동하지 않음. 2. 단계별 해결 방법 (Step-by-Step 실전 팁) 2.1. 키 입력 불량 해결 키보드 재부팅: USB 포트를 뽑았다가 다시 연결해 보세요. 드라이버 업데이트: 운영 체제의 장치 관리자를 열고 키보드 드라이버를 업데이트합니다. 키보드 테스트: 온라인 키보드 테스트 도구를 사용하여 문제가 있는 키를 확인합니다. 2.2. 키 스위치 고장 해결 스위치 점검: 고장난 키를 제거하고 스위치를 직접 확인합니다. 이때 스위치가 물리적으로 손상되었는지 확인합니다. 스위치 교체: 손상된 스위치는 교체가 가능합니다. 스위치 교체 키트를 구매하여 직접 교체하거나, 전문 수리점에 맡깁니다. 2.3. 연결 문제 해결 케이블 점검: USB 케이블에 손상이 없는지 확인합니다. 필요시 교체합니다. 포트 변경: 다른 USB 포트에 연결해 보세요. 포트 문제일 수 있습니다. USB 허브 사용: USB 허브를 사용하여 연결해 보세요. 허브가 문제를 해결할 수 있습니다. 2.4. 청소 및 유지 관리 키캡 제거: 키캡을 조심스럽게 제거합니다. 청소: 압축 공기나 부드러운 브러시를 사용하여 먼지를 제거합니다. 키캡 재장착: 청소 후 키캡을 다시 장착합니다. 3. 실패 시 대안 및 추가 팁 전문 수리 서비스 이용: 위의 방법으로 해결되지 않는 경우, 전문 수리 서비스를 이용하는 것이 좋습니다. 특히 스위치 교체는 경험이 없는 경우 어려울 수 있습니다. 예방적 유지 관리: 정기적으로 키보드를 청소하고, 사용하지 않을 때는 먼지 커버를 사용하는 것이 좋습니다. 사용자 커뮤니티 활용: Reddit, 네이버 카페 등에서 사용자 경험을 공유하고 문제 해결 팁을 얻을 수 있습니다. 기계식 키보드는 정기적인 관리와 적절한 문제 해결을 통해 오랜 기간 사용할 수 있습니다. 위의 팁을 참고하여 문제를 해결하고, 키보드를 최상의 상태로 유지하세요! ...

2026년 11월 14일

How to Fix & Optimize Ergonomic Mechanical Keyboard (2026 Practical Guide)

Troubleshooting and Optimizing Your Ergonomic Mechanical Keyboard (2026) Quick Summary Ergonomic mechanical keyboards are designed to enhance typing comfort and efficiency. However, issues may arise that affect performance or usability. This guide provides a step-by-step troubleshooting process and optimization tips to ensure your keyboard functions at its best. Step-by-Step Actionable Walkthrough Step 1: Check Physical Connections Inspect the Cable: Ensure that the USB cable is undamaged. Look for frays or kinks. Reconnect the Keyboard: Unplug the keyboard and plug it back into a different USB port to rule out port issues. Test on Another Device: Connect the keyboard to another computer to determine if the issue persists. Step 2: Update Drivers Access Device Manager: Right-click on the Start menu and select “Device Manager.” Locate Keyboards: Expand the “Keyboards” section. Update Driver: Right-click on your ergonomic mechanical keyboard and select “Update driver.” Choose “Search automatically for updated driver software.” Restart the Computer: After updating, restart your system to apply changes. Step 3: Check for Software Conflicts Close Background Applications: Close any unnecessary applications that may interfere with keyboard functionality. Disable Key Remapping Software: If you use software to remap keys, disable it temporarily to check for conflicts. Test in Safe Mode: Boot your computer in Safe Mode to see if the keyboard works correctly without third-party software. Step 4: Clean the Keyboard Unplug the Keyboard: Ensure the keyboard is disconnected from power. Remove Keycaps: Use a keycap puller to gently remove keycaps for deeper cleaning. Clean with Compressed Air: Blow out dust and debris from the switches and beneath the keycaps. Wipe Down Surfaces: Use a microfiber cloth slightly dampened with isopropyl alcohol to clean the keyboard surface. Step 5: Test Key Functionality Use Keyboard Testing Software: Download a keyboard testing tool (e.g., Aqua Key Test) to check if all keys register correctly. Identify Non-Responsive Keys: If certain keys do not respond, note their positions for further inspection. Step 6: Adjust Keyboard Settings Access Keyboard Settings: Go to Control Panel > Hardware and Sound > Devices and Printers > Right-click on your keyboard > Keyboard settings. Adjust Repeat Delay and Rate: Modify these settings to enhance typing responsiveness. Enable/Disable Filter Keys: Ensure that Filter Keys is disabled, as it can affect key responsiveness. Alternative Tips Firmware Update: Check the manufacturer’s website for any firmware updates specific to your keyboard model. Switch Replacement: If certain keys are consistently problematic, consider replacing the mechanical switches if your keyboard supports hot-swappable switches. Keyboard Layout: Experiment with different layouts (e.g., QWERTY, Dvorak) to find one that enhances your typing experience. Ergonomic Accessories: Use a wrist rest or an adjustable keyboard tray to further optimize your typing posture and comfort. By following these steps, you can troubleshoot and optimize your ergonomic mechanical keyboard for improved performance and comfort in 2026. ...

2026년 11월 14일

[광고] 2026 가성비 홈카메라 추천 Top 5 비교 및 실사용 가이드

이 포스팅은 쿠팡 파트너스 활동의 일환으로, 이에 따른 일정액의 수수료를 제공받습니다. 실내 보안을 위한 스마트 홈 카메라, 어떤 제품이 좋을까? 스마트 홈 카메라를 선택할 때 가장 많이 겪는 고민은 다양한 기능과 가격대 속에서 나에게 맞는 최적의 제품을 찾는 것입니다. 특히 실내 보안을 강화하고 싶다면 어떤 카메라가 더 나은 성능과 가성비를 제공하는지 살펴보는 것이 중요합니다. 여기서는 2026년 기준으로 최상의 성능과 합리적인 가격대를 갖춘 실내 보안 카메라 5개를 비교해 보겠습니다. 1. 헤이홈 스마트 홈카메라 5MP Pro G2 (GKW-MC503) 하드웨어 스펙: 5MP 해상도를 지원하며, 야간에도 선명한 이미지 제공. WiFi로 간편하게 연결할 수 있어 설치가 용이합니다. 장점: 고해상도 영상과 간단한 설치과정을 통해 누구나 쉽게 사용할 수 있습니다. 디자인이 심플하여 인테리어에 잘 어울립니다. 단점: 외부 저장장치에 대한 지원이 필요하며, 일부 사용자들은 앱의 사용자 인터페이스(UI)가 직관적이지 않다고 느낄 수 있습니다. 2. 국내발송 500W초고화질 음성 영상통화 멀티기능 듀얼밴드 와이파이 연결 CCTV AI (CS201-AW) 하드웨어 스펙: 500W 해상도로 시스템에 무리를 주지 않으면서도 고화질의 영상을 제공합니다. AI 기술이 탑재되어 있어 움직임 감지가 우수합니다. 장점: 듀얼밴드 WiFi 지원으로 다양한 환경에서 안정적인 연결 가능. 영상통화 기능이 추가되어 가족들과 소통도 가능합니다. 단점: 가격대가 다소 높은 편이며, 음성 통화 기능이 다소 부자연스러울 수 있습니다. 3. 헤이홈 스마트 G2 홈카메라 5MP Pro+ (GKW-MC504) 하드웨어 스펙: G2 Pro와 유사한 5MP 카메라로, 더 나은 저조도 환경에서의 성능을 보강했습니다. 장점: 프로급 품질의 영상을 제공하며, 클라우드 저장 옵션이 있어 중요한 데이터를 안전하게 보관할 수 있습니다. 단점: 클라우드 저장에 대한 추가 비용이 발생할 수 있으며, 물체 인식 기능에 대한 민감도가 지나치게 높을 수 있습니다. 4. 타포 홈 보안 WIFI 카메라 실내용 하드웨어 스펙: 스탠다드 해상도를 지원하지만, 쉽게 설치된다는 장점이 있습니다. WiFi 연결이 안정적이며 다양한 홈 오토메이션 시스템과 연동 가능합니다. 장점: 가성비가 뛰어나 초보자도 쉽게 사용 가능한 모델입니다. 단점: 해상도가 낮아 세밀한 정보가 필요한 상황에서는 아쉬움을 느낄 수 있습니다. 5. AMSKY 홈캠 가정용 CCTV 카메라 실내용 (WiFi 2K QHD 초고화질, 360도 회전) 하드웨어 스펙: 2K QHD 해상도로 넓은 시야를 확보하고 360도 회전 기능을 통해 여러 각도에서 감시 가능합니다. 장점: 고해상도와 회전 기능이 수반되어 실내의 모든 부분을 잘 감시할 수 있습니다. 단점: 일반적으로 가격이 비쌀 수 있으며, 회전 기능에 따른 기계적인 문제 발생 가능성이 있습니다. 결론 사무용: 헤이홈 스마트 G2 홈카메라 5MP Pro+ 모델 추천. 가성비: 타포 홈 보안 WIFI 카메라. 입문자용: 헤이홈 스마트 홈카메라 5MP Pro G2로 시작해 보세요. 이렇게 다양한 선택지를 비교하여 자신의 필요와 예산에 맞는 최적의 스마트 홈 카메라를 선택하시길 바랍니다. ...

2026년 11월 13일

Top 5 Best Smart Home Security Camera for Desk Setup (2026 Buyer's Guide)

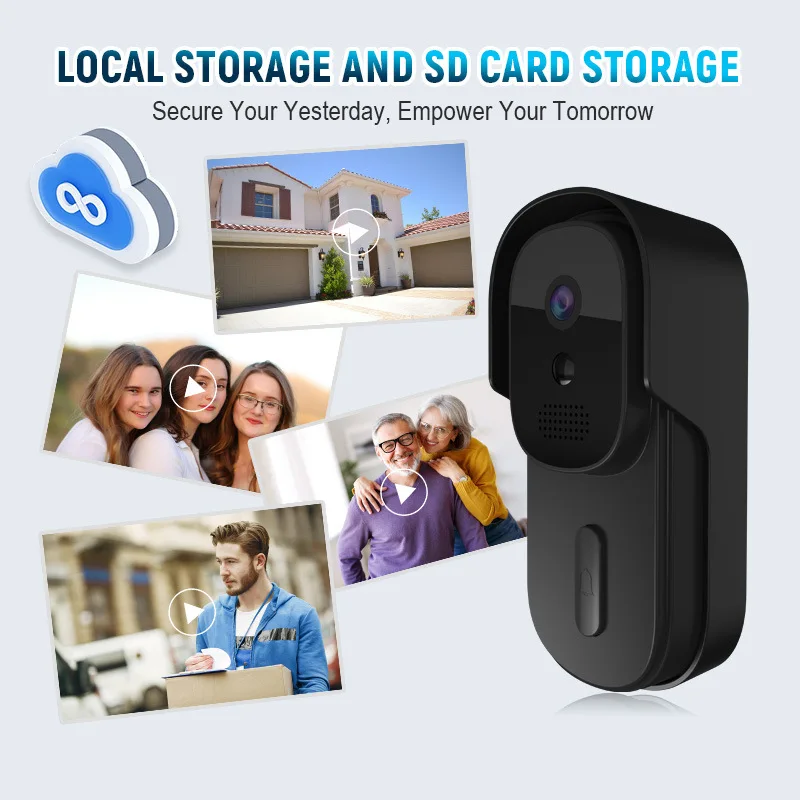
Essential Guide to Choosing the Best Smart Home Surveillance Cameras When selecting smart home surveillance cameras, it is crucial to focus on build quality, connectivity options, battery life, and ergonomics. Here’s a breakdown of five top products available in 2026: 1. Tuya Video Doorbell 2MP Waterproof 1080P Build Quality: This doorbell features a robust waterproof design, making it suitable for outdoor installation. Connection: Utilizes WiFi for reliable network connectivity. Battery Life: Can be powered by AC or battery; battery life can vary based on usage but typically lasts several weeks on standard use. Switches/Sensors: Equipped with a motion sensor and a two-way audio system. Desk Ergonomics: Compact design, ensuring easy integration with existing home setups. 2. HD Wireless Waterproof Doorbell Camera Build Quality: Constructed with weather-resistant materials for durability. Connection: Connects via 2.4 GHz WiFi for a stable connection. Battery Life: Battery-operated with an expected lifespan of 2-3 months under moderate use. Switches/Sensors: Features night vision capabilities and a voice change option for enhanced security. Desk Ergonomics: Sleek design allows for easy mounting and minimal aesthetic intrusion. 3. Ourlife 5K30FPS Action Camera Build Quality: Sturdy, waterproof design capable of withstanding up to 30 meters underwater. Connection: Bluetooth and WiFi compatible for easy file transfer and remote control functionality. Battery Life: Provides extended recording time with efficient energy management; average battery life is approximately 90 minutes at 4K resolution. Switches/Sensors: Touch screen LCD for intuitive use and easy access to settings. Desk Ergonomics: Lightweight and easy to mount on various types of gear. 4. Pet Cameras 1080P HD Wireless Camera Build Quality: Designed to withstand the rough environment typically created by pets, featuring a durable casing. Connection: Connects via WiFi to enable remote access to live video feeds. Battery Life: Requires a continuous power source, as it is not battery operated; designed for constant monitoring. Switches/Sensors: Includes motion detection for alert notifications. Desk Ergonomics: Compact size, easy to place on various surfaces around the home or mount on walls. 5. JOOAN 4K Wireless Outdoor Wifi Solar Camera Build Quality: Dual lens design made from rugged, weatherproof materials, ensuring longevity. Connection: Offers WiFi connectivity with optional solar charging capability. Battery Life: Integrated rechargeable battery enhances uptime, with charging supplemented by solar power. Switches/Sensors: Features human detection technology, reducing false alerts from non-human movements. Desk Ergonomics: Designed for exterior mounting, blending well with outdoor environments. Conclusion When selecting a smart home camera, prioritize the factors above to ensure maximum functionality and suitability for your needs. Each product provides unique specifications that cater to different surveillance requirements, ensuring you can find the perfect fit for your home. ...

2026년 11월 13일

로봇청소기 고장 증상 해결 및 관리 팁 자가 해결 및 관리 가이드 (2026)

로봇청소기 고장 증상 해결 및 관리 팁 로봇청소기는 현대 가정에서 매우 유용한 기기입니다. 하지만 사용 중에 다양한 고장 증상이 발생할 수 있습니다. 이 가이드는 2026년 기준 최신 OS 및 하드웨어 환경을 고려하여 로봇청소기의 고장 증상과 해결 방법, 관리 팁을 제공합니다. 1. 문제 원인 및 증상 요약 로봇청소기가 고장나는 원인은 다양합니다. 다음은 일반적인 증상과 그 원인입니다. 충전 문제: 청소기가 충전되지 않거나 배터리 소모가 빠름 작동 중 멈춤: 청소 도중 갑자기 멈추거나 오류 메시지 표시 청소 성능 저하: 먼지 및 이물질을 제대로 청소하지 못함 소음 증가: 평소보다 소음이 심해짐 센서 오류: 장애물 감지 실패 또는 경로 이탈 2. 단계별 해결 방법 (Step-by-Step 실전 팁) 2.1. 충전 문제 해결 충전기 점검: 충전기가 제대로 연결되어 있는지 확인합니다. 전원 공급이 정상인지 확인하세요. 배터리 상태 확인: 배터리 수명이 다했을 수 있습니다. 배터리를 교체해야 할 수 있습니다. 충전 단자 청소: 충전 단자에 먼지나 이물질이 쌓여 있으면 충전이 제대로 이루어지지 않습니다. 부드러운 천으로 청소하세요. 2.2. 작동 중 멈춤 문제 해결 소프트 리셋: 로봇청소기를 껐다가 다시 켭니다. 이 과정에서 임시 오류가 해결될 수 있습니다. 펌웨어 업데이트: 제조사의 공식 앱을 통해 최신 펌웨어로 업데이트합니다. 업데이트 후 문제가 해결되는 경우가 많습니다. 장애물 제거: 청소 경로에 장애물이 있는지 확인하고 제거합니다. 2.3. 청소 성능 저하 해결 필터 및 브러시 점검: 필터와 브러시가 막혔거나 더러워져 있으면 성능이 저하됩니다. 정기적으로 청소하고 필요 시 교체합니다. 바닥 상태 확인: 바닥에 이물질이 많거나 카펫이 너무 두꺼운 경우 청소 성능이 저하될 수 있습니다. 바닥을 정리하세요. 2.4. 소음 증가 문제 해결 부품 점검: 브러시나 바퀴에 이물질이 끼어 있을 수 있습니다. 이를 제거하고 부품을 점검하세요. 정기 점검: 기계 내부에 먼지가 쌓이지 않도록 정기적으로 청소합니다. 2.5. 센서 오류 해결 센서 청소: 센서에 먼지나 이물질이 쌓여 있으면 오류가 발생할 수 있습니다. 부드러운 천으로 센서를 청소하세요. 재부팅: 로봇청소기를 껐다가 다시 켜서 센서 오류를 초기화합니다. 3. 실패 시 대안 및 추가 팁 고객 지원 연락: 위의 방법으로 문제가 해결되지 않는 경우, 제조사의 고객 지원 센터에 문의하여 전문적인 도움을 받으세요. 사용자 커뮤니티 활용: 로봇청소기 관련 사용자 커뮤니티에서 유사한 문제를 겪은 사용자들의 경험을 참고하세요. 정기적인 유지보수: 정기적으로 필터, 브러시, 배터리 등을 점검하고 교체하여 로봇청소기의 수명을 늘리세요. 로봇청소기를 잘 관리하고 문제를 신속하게 해결하면, 청소의 효율성을 높이고 기기의 수명을 연장할 수 있습니다. 위의 팁을 참고하여 문제를 해결해 보세요! ...

2026년 11월 12일

How to Fix & Optimize Robot Vacuum Cleaner (2026 Practical Guide)

Troubleshooting and Optimization Guide for Robot Vacuum Cleaners (2026) Quick Summary Robot vacuum cleaners are designed to automate the cleaning process, but they can encounter issues that hinder performance. This guide provides a step-by-step troubleshooting and optimization process to ensure your robot vacuum operates efficiently and effectively. Step-by-Step Actionable Walkthrough Step 1: Check Power Supply Action: Ensure the robot vacuum is charged. How: Place the vacuum on its charging dock and confirm that the charging indicator light is on. Tip: If the light is off, check the power outlet and ensure the dock is plugged in properly. Step 2: Inspect Brushes and Filters Action: Remove and clean the brushes and filters. How: Turn off the vacuum and remove the brush covers. Use a cleaning tool or scissors to cut away hair and debris. Wash or replace filters as per manufacturer instructions. Tip: Clean brushes and filters every 1-2 weeks to maintain suction power. Step 3: Examine Wheels and Sensors Action: Check for obstructions in wheels and sensors. How: Inspect the wheels for hair or debris that may prevent movement. Wipe the sensors with a soft cloth to remove dust. Tip: Regularly inspect for blockages that could hinder navigation. Step 4: Update Firmware Action: Ensure the robot vacuum has the latest firmware. How: Connect the vacuum to its app (if applicable). Check for firmware updates in the app settings and follow prompts to install. Tip: Regular updates can improve performance and add new features. Step 5: Optimize Cleaning Schedule Action: Set an optimal cleaning schedule. How: Use the app to program cleaning times when the house is less occupied. Adjust settings for cleaning modes (e.g., deep clean vs. standard clean). Tip: Schedule cleaning during off-peak hours to avoid interruptions. Step 6: Clear Cleaning Area Action: Prepare the area for cleaning. How: Remove small items, cords, and obstacles that could hinder the vacuum’s path. Ensure that furniture is spaced to allow the vacuum to navigate easily. Tip: Use virtual barriers (if available) to restrict areas that should not be cleaned. Step 7: Monitor Performance Action: Track the vacuum’s cleaning performance. How: Review cleaning reports in the app to identify areas missed or cleaned poorly. Adjust settings or cleaning paths based on performance data. Tip: Regular monitoring can help identify recurring issues. Alternative Tips Battery Maintenance: If the vacuum’s battery life is decreasing, consider replacing it according to the manufacturer’s guidelines. Surface Compatibility: Ensure the vacuum is suitable for your floor types (carpet, hardwood, etc.) for optimal cleaning. Regular Maintenance: Schedule routine maintenance checks every 3-6 months to ensure all components are functioning correctly. Customer Support: If issues persist after troubleshooting, contact the manufacturer’s customer support for further assistance. By following this guide, you can effectively troubleshoot and optimize your robot vacuum cleaner for better performance in 2026. ...

2026년 11월 12일

[광고] 2026 가성비 공기청정기 추천 Top 5 비교 및 실사용 가이드

이 포스팅은 쿠팡 파트너스 활동의 일환으로, 이에 따른 일정액의 수수료를 제공받습니다. 어떤 공기청정기를 선택해야 할까? 2026년 최신 추천 제품 분석 공기청정기를 구매할 때, 어떤 제품이 나의 공간과 라이프스타일에 가장 잘 맞을지 고민하는 것은 매우 중요합니다. 성능, 소음, 디자인, 필터 교체 비용 등 다양한 요소를 고려해야 하기 때문입니다. 이번 글에서는 2026년 기준으로 소비자들이 요구하는 다양한 스펙을 갖춘 5가지 공기청정기를 분석해보겠습니다. 1. 가정용 업소용 공기청정기, 중소형 맑음 공기 공기청정기 소재: 플라스틱 외관으로 가벼운 무게 연결성: 별도의 연결 기능 없음 내구성: 일반적인 사용 환경에서는 무난하나, 장기 사용 시 내구성에 아쉬움 가성비: 가격이 합리적이며 필터 등 소모품 교체 비용도 저렴 장점: 공간 절약형 디자인으로 작은 공간에 적합, 공기 정화 성능 평균 이상 단점: 소음이 다소 있음, 연결성과 스마트 기능이 부족 2. LG전자 퓨리케어 360도 Hit 공기청정기 62㎡ 소재: 내구성이 뛰어난 ABS 플라스틱 연결성: 스마트폰 앱과 연동 가능, 원격 제어 가능 내구성: 고품질 부품으로 내구성이 우수 가성비: 상대적으로 가격은 높지만, 성능이 뛰어나 장기적 가성비는 높은 편 장점: 360도 공기 청정 기능, 대규모 적용 가능 단점: 초기 구매 비용이 부담 3. 에어라벨 원룸 공기청정기 저소음 프로 미니 공기청정기 음이온 케어 소재: 경량 소재로 이동이 간편 연결성: 기본적인 기능에 집중, 스마트 연결 없음 내구성: 내구성이 양호하나, 강한 충격에 취약 가성비: 저렴한 가격에 음이온 기능 추가, 실속 있는 가격대 장점: 조용한 작동 소음, 효율적인 미세먼지 제거 단점: 필터 성능이 다소 간소, 작은 공간에서 최적 4. LG전자 퓨리케어 360도 오브제컬렉션 플러스 공기청정기 100㎡ 방문설치 소재: 고급스러운 디자인의 금속 및 유리 소재 연결성: 스마트폰 연결 및 음성 인식 기능 내구성: 내구성 뛰어나며, 디자인을 중시하는 소비자에게 적합 가성비: 고가이지만, 그에 상응하는 멋진 디자인과 성능 장점: 100㎡ 범위를 커버하는 강력한 성능, 인테리어와 잘 어우러짐 단점: 설치비용이 추가 발생 5. 필립스 미니 공기청정기 600 시리즈 19.7㎡ 소재: 경량 플라스틱 바디로 이동성 좋음 연결성: 기본적인 기능에 충실하며, 스마트 연결 없음 내구성: 소형으로 상대적으로 내구성이 낮음 가성비: 저렴한 가격대지만 음질 품질은 우수 장점: 작고 아늑한 공간에 최적화된 설계, 실용적인 디자인 단점: 필터 주기 교체가 다소 잦음 결론 사무용: LG전자 퓨리케어 360도 Hit 모델 가성비: 가정용 업소용 공기청정기 입문자용: 에어라벨 원룸 공기청정기 각 제품의 장단점을 고려해보면서, 자신의 생활 공간과 예산에 가장 적합한 공기청정기를 선택하시기 바랍니다. ...
2026년 11월 11일